Monday, April 28, 2014

White versus Green Asparagus


Over lunch this week we were discussing the difference between white and green asparagus. The question was whether green asparagus is the same species as the white or two different species, which is why they would be different colors.


Purple, white and green asparagus
Purple, white, and green asparagus

Oh, the power of Google! I learned that  white and green asparagus are the same species but it's the way that they are grown that affects the color of the vegetable. To grow white asparagus the farmers or gardeners cover the entire shoot with dirt. Without sunlight, the asparagus stays white.

Chlorophyll a molecule
I remember learning in a Plant Physiology class at NC State that it is the magnesium   that is required for the synthesis of chlorophyll, which makes plants green. The magnesium is connected to the center of the chlorophyll ring and is the element necessary to convert light into energy. In general terms, the magnesium molecule is necessary for the formation of chlorophyll, which makes plants green. Chlorophyll absorbs red and blue light, reflecting green light which is why plants look green. If you are interested in learning more, check out the website credits below, these are great resources for additional learning! 


Back to the asparagus. The most abundantly grown are green in color, with white less so and considered a delicacy. White asparagus are grown mostly in Europe and South America and can be pretty hard to find in the United States. There are even purple asparagus! This is a different variety than the other two and is purple in color due to the pigment called anthocyanin.

I really like asparagus, it is probably one of my favorite vegetables. I didn't think to plant any in our garden this year mainly due to lack of garden space. Maybe next year we will try to grow year-old asparagus crowns. This vegetable is perennial, so it comes back every year. I learned that the plants are monoecious, which means that the whole plant is either male or female. The male plants are what you want if you are looking for a more productive crop. Once established, the asparagus crop is good for 20 to 25 years! The organicgardening.com website below has some great tips for gardening asparagus, which we may try next year. 

Asparagus Websites:

www.asaparagus.com.au/
http://www.huffingtonpost.com/2012/04/09/white-asparagus_n_1412329.html
http://www.organicgardening.com/learn-and-grow/asparagus-growing-guide
Asparagus photograph: www.dreamstime.com

Chlorophyll Websites:

http://www.naturalnews.com/024847_magnesium_medicine_insulin.html
http://www.wisegeek.com/what-is-the-connection-between-chlorophyll-and-magnesium.htm
Chlorophyll photograph: http://en.wikipedia.org/wiki/Chlorophyll

Friday, April 25, 2014

Herby Garden

I love the way that herbs smell and taste and I think that they are absolutely beautiful. I started growing herbs in an AeroGarden - this thing is amazing. It's basically a water bath where you set seed pods (containing soil and seeds), add some nutrients every couple of weeks, and set the light system up for whatever you are growing (herbs, veggies, flowers - and it changes the light cycle for you). It is very easy to set up and requires little maintenance. The thing even blinks to let you know if you need to add water or nutrients. I have one that holds 7 seed pods and the first thing I grew were herbs. There were two types of basil, mint (which sadly never made it past the top of the pod), cilantro, parsley, chives, and dill. I harvested them pretty regularly to keep the leaves from interfering with the other herbs for full access of light.


Aerogarden with 7 herbs


Then, I had the brilliant idea of moving them outdoors (once the soil had thawed out) in our front yard where a rosemary bush had once inhabited. I really wanted to start some tomato plants in the AeroGarden since the herbs grew so well. I figured that there would be plenty of light and Nate regularly waters that area with aquarium water (full of fish and turtle poop) when he changes the water once a week. Four out of the six have made it so far - the basil plants went kaput.

Chives
Dill
Cilantro
Parsley


Pasta dish with basil
We use the parsley and cilantro pretty regularly; made some delicious salsa last weekend. The salsa was great, it had diced tomatoes, jalapeno pepper, fresh cilantro from the garden, and a lot of onion. If all goes well, then by summertime we should be able to make our own salsa with all fresh ingredients!

We also have planters that hang off of the deck, where there is also plenty of sunlight. When Nate and I went to Lowe's last weekend, we go pretty much every weekend if the weather is nice and we are in town, I was extremely attracted to the herbs and pepper plants that were already more than seedlings. So, we loaded up with herbs - two basil plants to replace the ones that died, thyme, rosemary, mint, and tarragon. And I have to say I'm pretty pleased with the results by just planting them in what were originally going to be flower planters. We've already made a pasta dish using the basil.

Rosemary, Basil, Thyme
Mint, Tarragon, Basil
I do worry that I may overwater or that they will get too much sun or not enough. This is the first time I've really tried to grow herbs outside (I can't count the AeroGarden as really gardening because it really did all the work for me). Supposedly basil is really easy to grow - but since I had them die after transplanting I'm not sure I believe that! Nate told me that when he lived at the Venice house (study abroad through Wake Forest) they had a humungous basil plant. He's probably aiming for that, I have lower goals of just keeping the thing alive :-) It is very possible that the ground was oversaturated with water. We have been getting a ton of rain this winter/spring. Which can be a curse and a blessing. It has been great for our new lawn, but you do not want pooling of water around flowers, veggies, or herbs. I think that having the herbs in the hanging planters will allow for great drainage and hopefully eliminate over-saturation.

Any tips or suggestions for growing herbs would be greatly appreciated!


Tuesday, April 22, 2014

Gardening 101

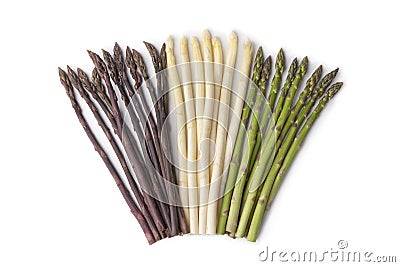
I have always wanted my own garden. It's funny, most people assume that because I have a Plant Biology degree that I know everything there is to know about taking care of plants. I do know a fair amount, but I am much more well-versed speaking about algae. I had a fantastic experience the summer between undergraduate at Wake Forest and my PhD program at NC State working on Dr. Weigl's orchard. He had every fruit and vegetable you can imagine from asparagus (which I have learned is perennial and takes 2 years to mature) to okra, blueberries to apples, nuts, tomatoes, peppers, squash, etc. I could go on but suffice to say that I got my first real taste of gardening (and boy did we eat well!) and have wanted my own garden since then.

Fast forward 6 years and we have a house with a great yard for gardening! I am literally starting from scratch so I want this blog to be a place where I can share my gardening adventures; ideas and tips for what works (and what doesn't!); and, if all goes well, share the meals we prepare with the veggies grown in our garden.

Like any good student, I began by reading websites and other blogs of gardeners. It seemed like everyone had a similar theme: a lot of time and effort can be saved if you start with a raised garden bed, more specifically a square foot garden. Intrigued, I downloaded a highly reviewed book called "All New Square Foot Gardening" by Mel Bartholomew for my Kindle and got to reading. If you do decide to garden, I highly recommend this book.

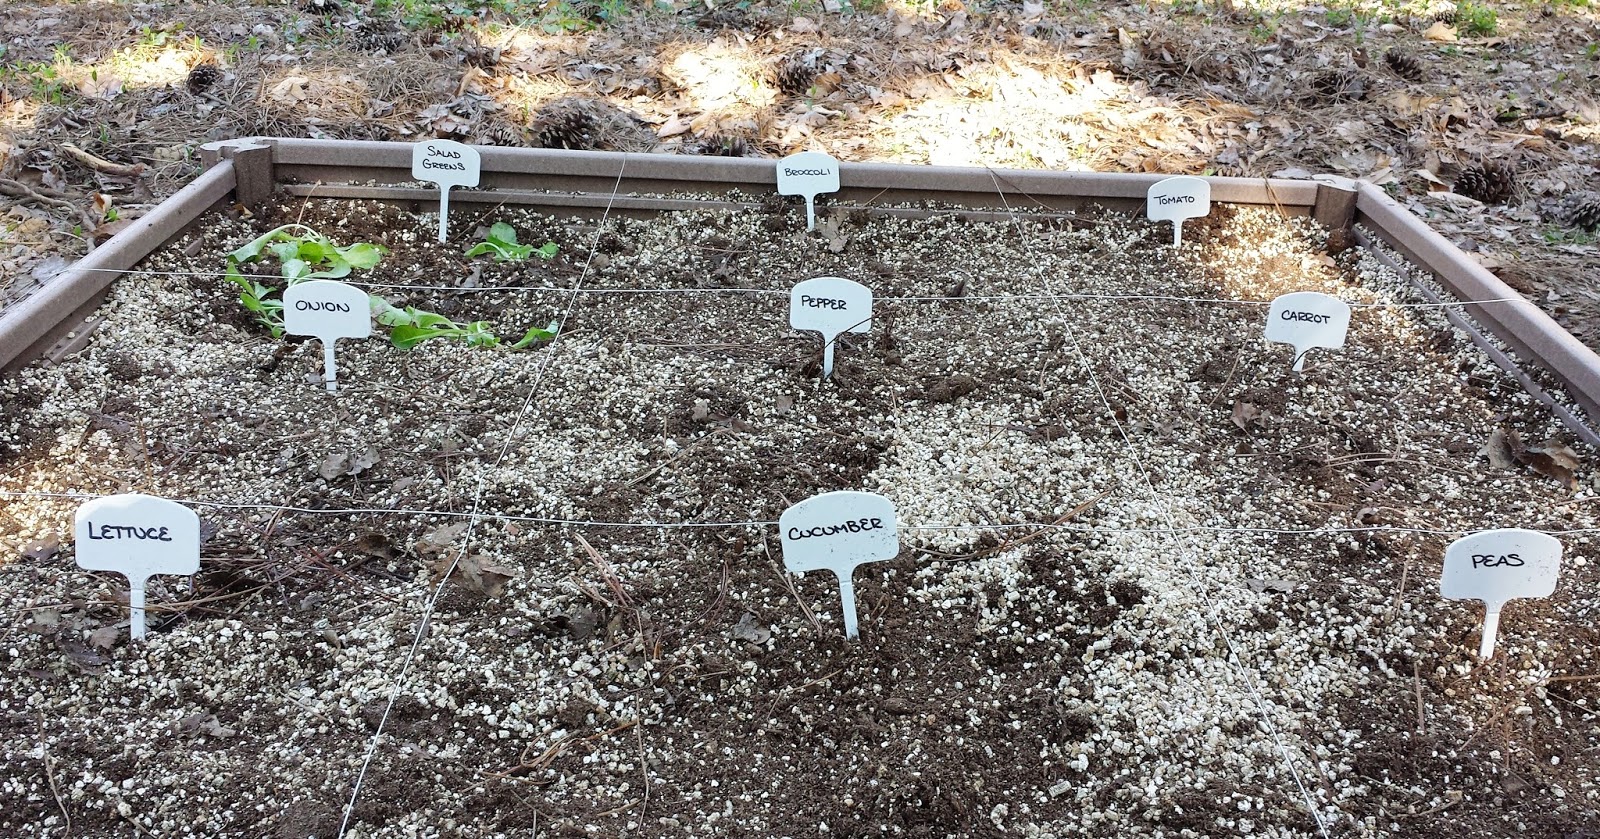
Set-up of gardens with wire to divide each 3x3

After reading the basics, I felt like I had enough information to get started. I bought two square foot gardens from Amazon (you can save money by making your own, but I enjoy the convenience of ordering exactly what you need). I like that this garden can be easily organized by simply placing ropes/strings to divide them into squares.

First square foot garden

I decided to order a set of garden seeds from Amazon (I mean really, where else!) and waited until the right time to plant. This turned out to be the beginning of April - here is is a photograph below that Nate took setting up my materials to plant. I had class that day, but was so excited afterward to plant my first of two gardens. I followed the "Mel's Mix" composition which is 1/3 compost (yes, we have our own compost pile), 1/3 vermiculite, and 1/3 top soil and then planted the seeds according to their directions.

Labels, knee pads, gloves, seeds for planting


The photographs above show the lay out of each garden, complete with wire dividers, labels, and the soil mixture. Once the gardens were filled with the mixture, it really did not take all that long to plant the seeds.

Jalapeno plant (not from seed)

It's been  about two and a half weeks since I planted the first garden, one and a half weeks since the second. I check on them every day - I feel like a mother hen in that way. I noticed that some type of animal (squirrel, rabbit, our dog Deacon?) has been digging up my seeds! So, we put a fence and some netting around the gardens. You can definitely do this a cheaper way, but I like the look of the fence that we got. I had to replant some of the squares and I replaced corn with a jalapeno plant

Set up of both gardens with the fence and mesh netting

Carrot seedlings


This has been a great experience so far and I am happy that I can share it on this gardening blog. In the near future I plan to post about the herbs that we are growing on our deck (where they get plenty of sunlight) and we have already started making delicious pasta dishes using the basil.

=''=